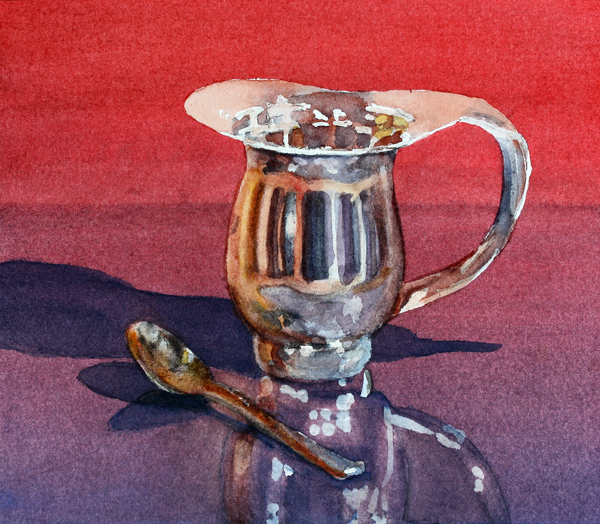
This past week in our Still Life in Watercolor class, we painted old earthy-looking found objects, such as jugs on a bench, old kitchen utensils, and old door latches and hinges. The idea was to find rusty, textured objects and materials that would lend themselves to watercolor techniques that yield lots of texture. For my demonstration painting, I choose the image below, which is a photo of old wrought-iron and brass kitchen ladles hanging in front of a hearth. The photo was actually taken at Colonial Williamsburg in Virginia about 30 years ago! (I hang on to my reference photos forever--you never know when you might need them!).

Step 1. I did this painting on a half sheet of stretched Arches 140 lb cold-press. First I created a 13x20" template of the image on cheap paper using my printer, and I used this to trace the complicated image onto the watercolor paper using Saral graphite transfer paper. Then I went over the drawing with an 01 brown Micron pen, which is indelible and will not come off with a lot of wetting. I am going to use my special "rivulet technique" for this painting to create an interesting textured underpainting, and I don't want my whole drawing to wash off!

Step 2. Now I created my background wash. This is a special technique I devised about 30 years ago when doing paintings of construction rubble. I mix up a large pool of raw umber to about a heavy cream consistency and paint it all over the paper. Usually I intersperse a few other colors during this process, keeping the whole sheet wet all the while. Then I hold the board vertically, and spray water on this raw umber wash, making the paint run down the page and form interesting channels and "rivulets". Students in my classes have seen this technique, and unfortunately I don't have a photo showing the whole process, but here are the end results:

Step 3. I decided that since these were Early-American kitchen tools, I would give the painting a muted red, white, and blue theme to suggest "Americana". I might even incorporate an object in place of the metal chain on the right to suggest something purely American and from the hearth and home. Got to think about that! Here I have begun glazing in some background colors, using Winsor & Newton brown madder on the left and cobalt blue on the right. These are transparent colors that will allow the textured background wash to show through. All the colors I will be using in this painting are "liftable" (i.e. they are not staining colors), which will allow me to come back with a stencil brush after they are dry and lift out any shapes I want. You have tremendous flexibility with this approach.

Step 4. Here I have added a third large wash using a mixture of cobalt blue and permanent violet. I like to tint and "tame" all of the raw umber portions of the picture, because I find that the raw umber alone is sometimes a little harsh. By applying these large washes very gently, I avoid lifting up the underlying raw umber.

Step 5. Now for the fun part. I have begun lifting out color to bring out shapes. All of the spoon shapes are going to be created this way because they are actually lighter than the background. Using a natural bristle stencil brush (normally used for applying paint to stencils) and a little water, I gently scrub away the paint and then immediately blot with a paper towel. To get a harder edge around my objects, I surround the shape with pieces of 3M drafting tape. Here I first selectively removed paint from the spoons to suggest their shiny surface, and then I went back and tinted them with yellow.

Step 6. You will notice in the original photograph that part of the fireplace is painted white, which makes the tools stand out nicely against it. Sometimes I use titanium white in these pictures, but in a semi-transparent way so that the rivulets will show through. That is what I have done here, starting with the white part on the left. Later I will finish this wall if it seems to be working well. Meanwhile, I continued painting more of the tools in the same manner, using drafting tape to define the edges and then lifting out the paint with a small stencil brush, then tinting the area with the appropriate color. You can get almost down to the white of the paper with this technique, as long as you are not using staining colors. For a list of all the paints I have on my palette, showing which ones are staining, visit my website at: Susan Murphy supply list
 Step 7. Making progress on lifting out all the handles. It can be slow work but is kind of fun. You feel confident that you are creating good shapes and you have a great deal of control, something which is difficult in watercolor.

Step 8. Here I have expanded the dark background (it is actually inside the fireplace) and added more darks. I'm afraid this is as far as I have gotten at this point, and will have to show you the finished painting later! Colors used in this painting so far are Winsor & Newton raw umber, cobalt blue, brown madder, aureolin, titanium white, French ultramarine, and Holbein verditer blue, permanent violet, and neutral tint. I hope you get to do a "rustic still life" and if you do, please stop by and show it to me!

We are having a fabulous exhibit of paintings by my students, called "The Art of Watercolor", which will include dozens of beautiful paintings. See your invitation below! The grand Opening Reception is the weekend of May 12 and 13 (Mother's Day Weekend) and the show continues through August 19th. You will be inspired by dozens of paintings from the still life class, figure class, and abstract class. Come and enjoy the artwork, elegant refreshments, and good conversation. There will be a door prize (one of my framed giclee prints) and admission is FREE! (well, isn't it always?...) Hope you can come!


Step 1. I did this painting on a half sheet of stretched Arches 140 lb cold-press. First I created a 13x20" template of the image on cheap paper using my printer, and I used this to trace the complicated image onto the watercolor paper using Saral graphite transfer paper. Then I went over the drawing with an 01 brown Micron pen, which is indelible and will not come off with a lot of wetting. I am going to use my special "rivulet technique" for this painting to create an interesting textured underpainting, and I don't want my whole drawing to wash off!

Step 2. Now I created my background wash. This is a special technique I devised about 30 years ago when doing paintings of construction rubble. I mix up a large pool of raw umber to about a heavy cream consistency and paint it all over the paper. Usually I intersperse a few other colors during this process, keeping the whole sheet wet all the while. Then I hold the board vertically, and spray water on this raw umber wash, making the paint run down the page and form interesting channels and "rivulets". Students in my classes have seen this technique, and unfortunately I don't have a photo showing the whole process, but here are the end results:

Step 3. I decided that since these were Early-American kitchen tools, I would give the painting a muted red, white, and blue theme to suggest "Americana". I might even incorporate an object in place of the metal chain on the right to suggest something purely American and from the hearth and home. Got to think about that! Here I have begun glazing in some background colors, using Winsor & Newton brown madder on the left and cobalt blue on the right. These are transparent colors that will allow the textured background wash to show through. All the colors I will be using in this painting are "liftable" (i.e. they are not staining colors), which will allow me to come back with a stencil brush after they are dry and lift out any shapes I want. You have tremendous flexibility with this approach.

Step 4. Here I have added a third large wash using a mixture of cobalt blue and permanent violet. I like to tint and "tame" all of the raw umber portions of the picture, because I find that the raw umber alone is sometimes a little harsh. By applying these large washes very gently, I avoid lifting up the underlying raw umber.

Step 5. Now for the fun part. I have begun lifting out color to bring out shapes. All of the spoon shapes are going to be created this way because they are actually lighter than the background. Using a natural bristle stencil brush (normally used for applying paint to stencils) and a little water, I gently scrub away the paint and then immediately blot with a paper towel. To get a harder edge around my objects, I surround the shape with pieces of 3M drafting tape. Here I first selectively removed paint from the spoons to suggest their shiny surface, and then I went back and tinted them with yellow.

 |
| A few of my favorite stencil brushes--sometimes I take an ordinary taklon brush and give it a "crew cut", like the pink one and the narrow brush on the bottom. OK, OK, the top one is actually a make-up brush! |


 | |||
| this is a close-up of the above so you can see the rivulet wash better |
 |
| a close-up of the spoons |

Announcement:
We are having a fabulous exhibit of paintings by my students, called "The Art of Watercolor", which will include dozens of beautiful paintings. See your invitation below! The grand Opening Reception is the weekend of May 12 and 13 (Mother's Day Weekend) and the show continues through August 19th. You will be inspired by dozens of paintings from the still life class, figure class, and abstract class. Come and enjoy the artwork, elegant refreshments, and good conversation. There will be a door prize (one of my framed giclee prints) and admission is FREE! (well, isn't it always?...) Hope you can come!